My Wi-Fi Cantenna project - building a Wi-Fi antenna out of a Pringless can.
10.8.2011 - Figuring out the last details and buying some parts
Part list
All-thread, 3mm diam., 15cm long
5 washers, inner diam. 3mm
2 nuts, inner diam. 3mm
Aluminum tubing, diam. 6mm
12 gauge solid copper wire (2mm diam.)
Antenna connectors
(N-type on antenna,
Reverse SMA on Wi-Fi card)
USB Wi-Fi card
Pringless can + two lids
The webpage I took my instructions from promised it would take about 1 hour to build the antenna. Today I slowly start to realize that this project will take a bit longer to finish.All-thread, 3mm diam., 15cm long
5 washers, inner diam. 3mm
2 nuts, inner diam. 3mm
Aluminum tubing, diam. 6mm
12 gauge solid copper wire (2mm diam.)
Antenna connectors
(N-type on antenna,
Reverse SMA on Wi-Fi card)
USB Wi-Fi card
Pringless can + two lids
Yesterday I spent several hours figuring out what parts to buy and where to buy it. Especially hard was finding a way to hook the antenna into my computer. I decided to buy a USB Wi-Fi card (without an external antenna connection) and try to mount an antenna connection to it later.
After looking up the parts needed on the internet I realized the antenna connectors would cost 15€ themselves. The USB Wi-Fi card was a bit cheaper, only 10€ and still with quite good specs.
I went to three different shops just to get my hands on the all-thread, washers, nuts and Pringless can for about 7 Euros. Another two shops will need to be visited to get the antenna connectors and Wi-Fi USB card. But I decided to get those parts later because I didn't knew whether the project would succeed or not. That because of:
- I could not find any aluminum tubing, I need to find something else
- The all-thread was too short and two of them need to be joined together
Why did I choose reverse SMA connectors to connect the cable with the Wi-Fi card?
Because my router also uses Reverse SMA for its antennas, and that would make it possible to easily connect the antenna to my wireless router. But more about that when/if I buy those 15€ connectors.
Investigating the possibility of connecting the Cantenna to my computer's internal Wi-Fi card
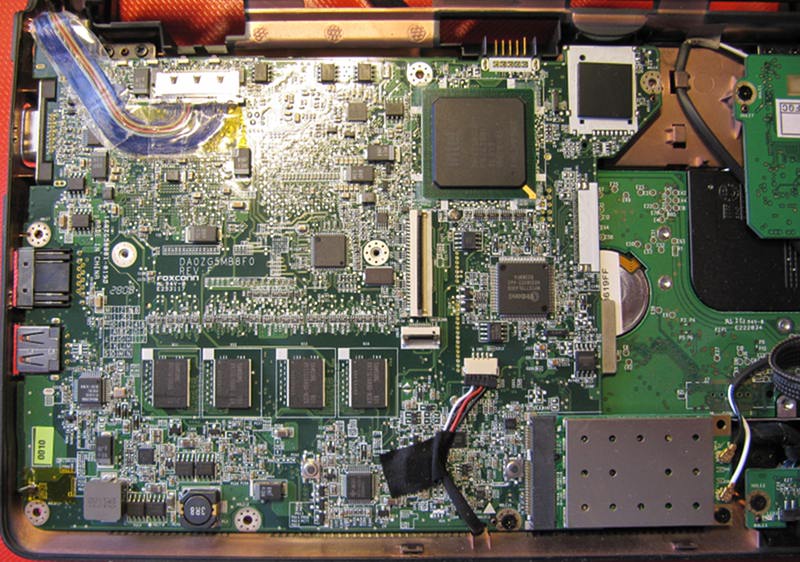 Internal Wi-Fi card in bottom right corner
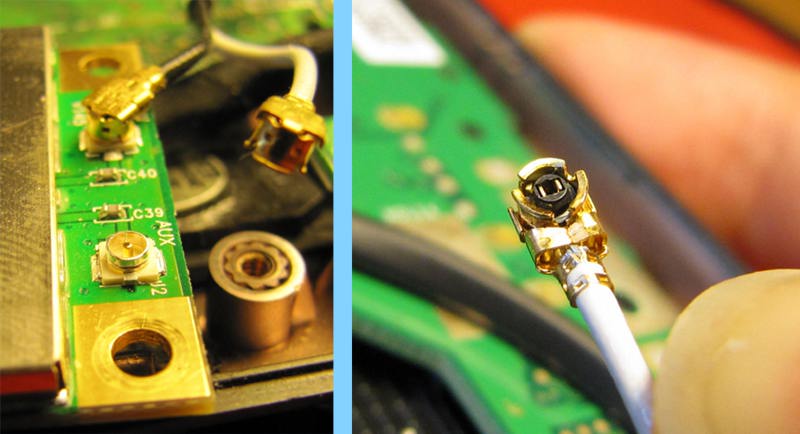 As the Acer Aspire One 8" is known for having a weak Wi-Fi signal it would not be an ultimate setup to use the Cantenna together with that Wi-Fi card. It can however be used for testing whether the Cantenna is working and how much increase in signal it can deliver.
11.8.2011 - Start building the Cantenna
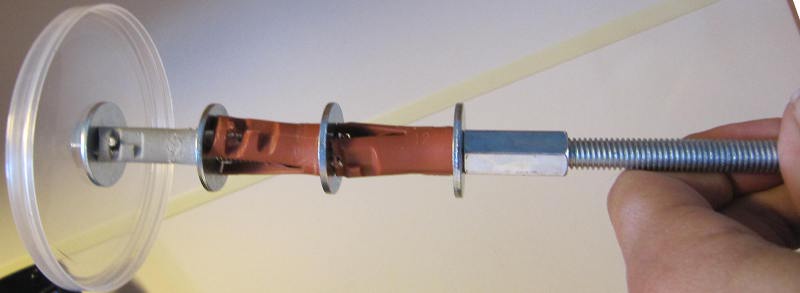
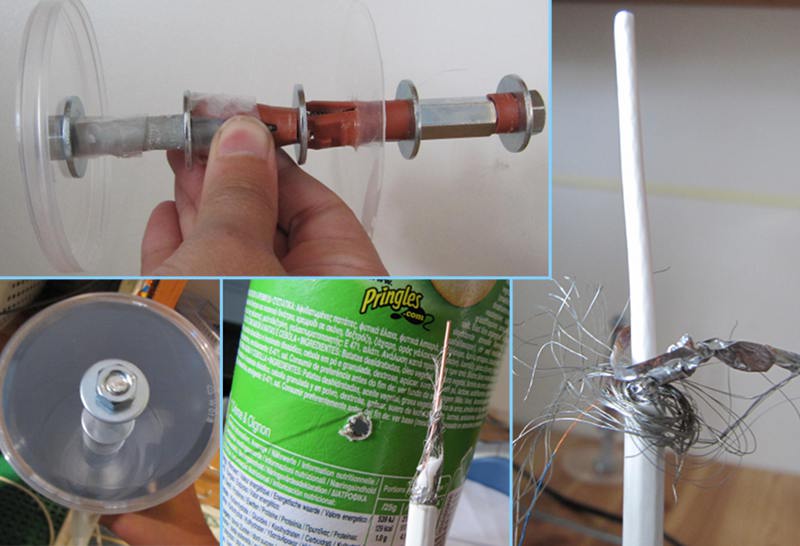
 The internal part of the Cantenna is almost done with the two all-threads joined together, the washers, nuts and 1 of 2 Pringless lids in place.
As I could not find any aluminum tubing, I instead used some plastic wall straps (right image) by drilling a hole in the middle of them. Whether it is a working replacement or not, at least this page states that the tubing is just for holding the washers in position. Another question mark is how my too thick all-thread is going to affect antenna performance. I should also mention that the solid copper wire I have got my hands on is just 0.7mm when it should be 2mm.
15.8.2011 - Finishing the Cantenna
 After having a break in the antenna building, today I finished the Cantenna. When testing with my laptop's builtin Wi-Fi card the results weren't as good as expected.
Test results when connecting Cantenna to my laptop's internal Wi-Fi card: (higher is better)
- SNR 30 using Cantenna
- SNR 40 using laptop's builtin antenna
Why is the Cantenna (which should provide a 13dB gain), performing worse than my laptops builtin antenna?
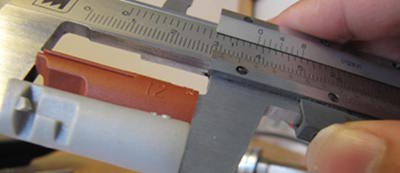
- The all-thread is too thick (8mm when it should be under 3mm).
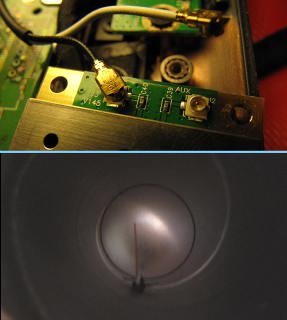
- The laptop's builtin card (which I connected the Cantenna to), have 2 or 4 inputs (don't know, upper right image), but I only connected my Cantenna to one of them.
- The Pringless can is taller than the instructions were written for. The all-thread is a few centimeters away from the copper wire inside the can. The instructions only says it should be just forward of it.
- My washers were a little thicker than the ones in the instructions, making the all-thread about 3mm longer than in the instructions.
- I didn't check that the solid copper wire inside the can was pointing straight, it could have been angled when testing (as you see on the bottom right image).
Comments powered by CComment